Monday, January 26, 2015

Mom's Egg - An artifact

I recently found some interesting artifacts that I wanted to talk stories with you about.  The artifact on the left is a broken off adze (higam in Chamorro) head made out of a giant clam (hima in Chamorro) shell.  I posted my journey in making some higam hima in this post.
At times, when you happen upon broken clam shells, it is hard to distinguish if they are artifacts from the ancient Chamorros.  This one was pretty clear in that you can see the straight edges that was worked on as well as the angled cutting edge.  I illustrated how the whole adze head could have looked like if it was whole.  There are some illustrations here from the The Catalogue of Prehistoric Micronesian Artifacts Housed in Japan (Intoh, May 1998) that I wrote about as well.

Mother's Egg
The artifact on the right is a mystery to me.  Some people who have found similarly shaped stones think that they are the ancient Chamorro sling stone is acho' atupat (or atupak).  I describe sling stones here when I fashioned some myself.  History books describe them as egg or acorn-shaped stones fashioned with “jasper-like” stone, or with sun or fire-hardened clay. People now use the words biconical or football-shaped to describe them.  The stone here is really in the "egg-shaped" category. 
A few years ago, I saw one displayed in the Saipan Museum that was very smooth and also egg-shaped.  A historian that I was acquainted with shared a very interesting theory that he had about these egg-shaped stones.  Maybe they are not sling stones.  He says that they could possibly be implements used by some of the ancient women to strengthen their pelvic muscles, much like modern day Kegel exercises.  Smiling, I had to ask how he came about that seemingly off-beat theory.  He asked if I ever wondered about the expression, i chada nana mu?  I told him that I know that it is the most offensive thing you can say to someone in the Chamorro language but literally, it translates to, "your mother's egg".  He asked me to consider the meaning of the expression now with this theory.  Interesting, yes?  Anyway, I didn't get to ask him if there were any other evidence in stories or in literature that may support his hypothesis.  What do you think?
 
Thank you for talking stories with me again.

Ti napu.

The Beachcomber


Thursday, January 8, 2015

2015 - The Beach and the Blues

This is the first hike of the year 2015: go down to San Juan Beach and then go to Hidden Beach.  At least that was the plan.  The path to Hidden Beach was overgrown, so Laurina and I ended up going to Old Man by the Sea instead.  It was an enjoyable walk even though the body ached and the lungs were screaming.  I gotta get back in shape.  There seems to be a lot more tourist traffic here.  The beach has grown probably due to a few small storm events last 2014.  The sand has reached where the coconuts and fish-kill trees (Barringtonia asiatica) once dominated.

I found this gem at Old Man.  I told myself that for 2015, I will study Blues guitar.  It seemed like the universe was with me when I found this broken bottle top.  With a few modifications it can be used as a guitar slide.
I brought the thing home all excited, but maybe a little too excited.  I took the aluminum lip and some plastic off the top and brought out my grinder.  I was too in  a hurry, and I cracked what the universe has given me so serendipitously.  I was so bummed.

All I needed to do was to grind the rough edge but the grinder was too rough, and I didn't cool the glass off with water often enough.
 
Bye bye bottleneck slide!  A few days later, I researched some DIY online so I can practice on a wine bottle I already had.  It wasn't the best choice since it seemed a bit short and had a pronounced line where the halves of the glass were bonded.  I wanted to get some practice though before finding a better candidate.
So, I got the bottle to crack where I wanted it to and used a Dremel bit that was one made specifically for glass.  It is a good second try, I think.
 Hopefully, I can make a better one soon and that my playing improves dramatically.
Thank you for talking stories.  Happy New Year!

Tin napu,

The Beachcomber

Tuesday, July 31, 2012

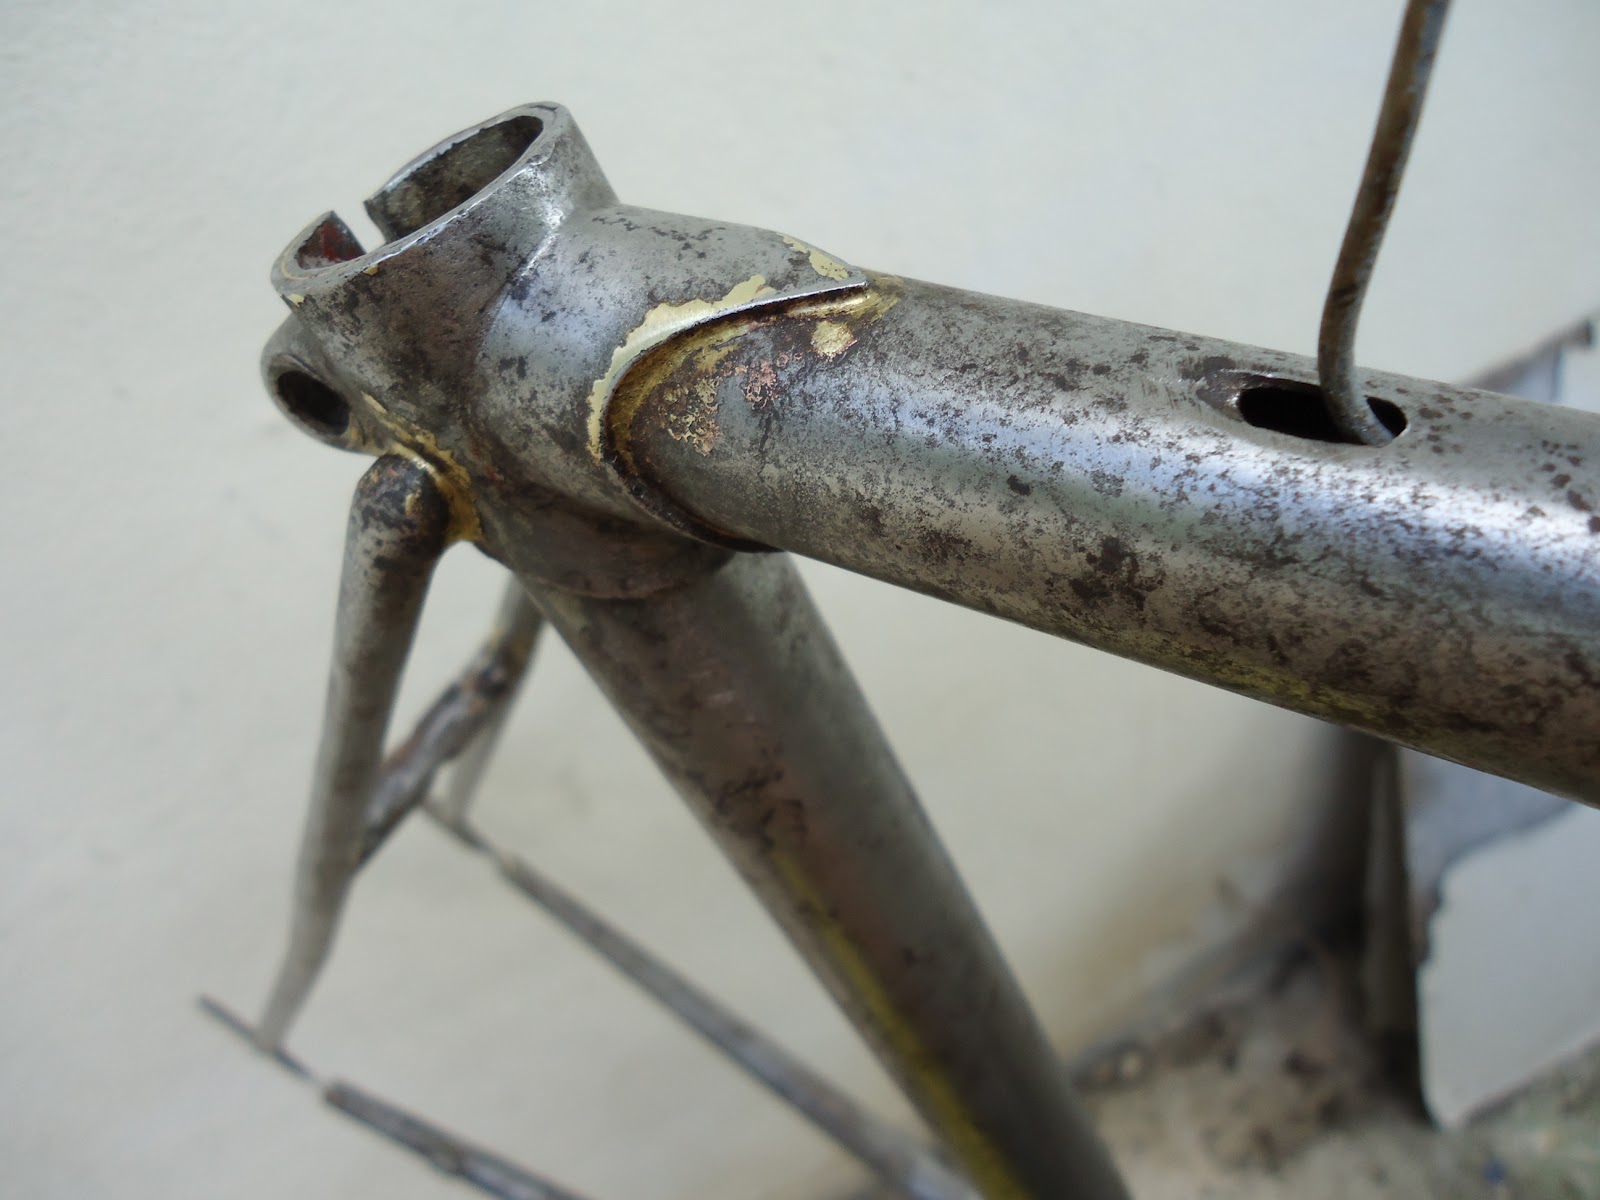
Bike Resto - Done

A few years ago, I gave up biking on my old 7-speed road bike.  I found it hard to climb hills , and the drivers and pedestrians on island were just not too safe towards cyclists.  I ached to ride though, thought that I needed a new ride, and just couldn't afford to upgrade my bike.  Well, fast forward a few years later and I got myself a new-used cyclocross bike, the riding conditions got better, and my friend Greg came back as my riding partner.  There are lots of stories to tell about our bike and riding adventures.

I learned a lot though through the internet especially a great bike forum called RoadBikeReview.  I learned more about wrenching and developed a love for vintage bikes.  I got to start thinking that I should try to restore the old 7-speed and not just let it rust away.  So I decided to do the restoration but not spend so much money while doing so.

BEFORE:
 
After a few years in storage, her brake and shifter cables and chain were rusty.  Who knew what condition of the steel frame and aluminum components after maybe more than 5 years?
After becoming a fan of vintage steel bikes, I was wishing and fantasizing that she was some sort of high-end oldie.  It turned out after a few questions posted on the bike forum that this is someone's fantasy Cannondale bike, since they never made any in steel.  Someone pointed out too that certain parts were stamped steel rather than forged, a sign of a lower-end bike.  It used to have a triple crankset, but the inner, smallest gear was gone.
 
You can usually find out a lot about a bike's identity by the stamped number on the bottom bracket.  I had to clean this out to see what the numbers were.  Unfortunately, even after cleaning it up the best guess the forum gave me was that it was a low-end, possibly Japanese touring bike with parts salvaged from here and there.
  
STRIPPING and PREPPING:
I decided to strip and repaint.  I used instructions from MikesBikes which was informative and easy to understand. Again, to keep the cost low, I decided to use rattle can primer, paint and clear coat.  Here are some picture after applying the paint stripper.  That's some really caustic stuff.
 
 
Sanding and Cleaning the Frame:
Prepping the frame for painting took the most time.  Sanding all of the paint and getting the frame bare and smooth for the paint job was hard but you get to learn so much about the frame and materials of the bike.  I discovered that the frame is of a lower-end variety of steel and it had a lot of fillers for the imperfections.  Still, I was determined to finish the restoration and enjoy the journey.  I was really enjoying using my hands the most. 
 
Greg lent me a bunch of tools to get the components off of the frame.  I never knew that such a simple machine has so many specialized tools!  To get the crank off, you need a crank puller; to remove the chain , you need a chain breaker; and so on and so forth.
 
So this is who you are?  The bottom bracket cleaned up showed an I.D. number, but it still wasn't a lot of information to go on.  Maybe one day, we'll get to know its origins.  I am guessing that the first 2 numbers mean that it was made in 1986.
Internally routing for cables?  I thought that's an option for high-end bicycles only.  To stop any internal rusting, I even used linseed oil to coat the inside of the frame.
I heart the fork.  The fork hearts me.  I found out later that his fork is probably a salvaged part since it really is too short for the wheels. 
  
AFTER
I decided that I liked a vintage white for the frame.  I decided against buying components or just stick to "restoring" rather than "upgrading".  After the paint job, I just decided to get a colorful Italian flag bar tape, red cables and red tires to give her a highlight color.  All the items were on sale through various online bike shops.  I was pretty happy with the cheap prices the quick service, which was nice surprise.  Being on an island really makes purchasing online an adventure in itself.
 
She's almost ready for a ride.  I just need to make some shifting adjustments to make her ready for the road.  I ordered a $13.00 cassette to make it easier to climb Saipan's hills but it came and was not compatible with my wheel hub.  I may just have to keep her on the flat roads (or get stronger legs). 
Well, she is finally done with a lot of help from near and far.  I wish there were more opportunities in the future to restore and to wrench.  I've gotten to really love using my hands, and being able to add an artistic flair to it all.  See you on the road!

Ti napu.

The Beachcomber

Monday, July 9, 2012

Gregory and the Torii

A few weeks ago, Greg asked if I wanted to go on a hike to get some avocados that were growing wild in a friend’s abandoned property.  The jungle had taken over the original farmland but the food crops still thrived and lucky for us, still produces in abundance and free to pick to our heart’s desire!  We ventured off in the morning- we, being myself, Greg, DJ and Greg’s dog, Griffin.  Beverly, having delivered just a few weeks ago, stayed home with their baby, Nolan. 

We first visited a torii before going into the jungle.  The torii is a Japanese entrance gate to what once was a Shinto shrine built in a natural limestone cave.  It is supposed to mark where the sacred ground of the temple begins.  The torii has two horizontal parts and two vertical columns that fell to the left or west from where it used to mark the entrance of the cave.   It most likely broke during WWII.

In the foreground of this picture, you can see the body and top cover of what looks like a lantern that stood in front of the gate.  In the middle lies one of the two columns that once stood horizontally, and the structure in the background is one of the horizontal piece of the torii.  It kind of reminds me of the symbol for pi- π .  

The gate fell to the left or west from where it used to mark the entrance of the cave.  This is one of the two-level bases.  


The topmost part of the structure is called kasagi and shimaki which you can clearly see in this picture.  The rectangular block to the right is the lower positioned horizontal piece called nuki.  It is hard to tell what style of torii it is from its condition and without more inspection.


We explored the cave a little bit but did not find anything real significant.  DJ thought this rock was a fossil, but it turned out it was cement from a ruined cement bag.
This is a view looking out from the small cave. 

Our party headed off into the jungle next.  Greg carried the long bamboo guaili’ (Chamorro for fruit picker) so that we could reach the avocados and coconuts.  The trail showed evidence of a once active farm with groves of avocados, bananas, coconuts, starfruit, tangerines, cassava, betel nut, taro and yams.  
The trail even had Arabica coffee trees!  DJ and Greg inspected some dried coffee beans from a tree.  Greg had to explain to him that they didn’t look like the brown coffee beans he has seen in pictures because they haven’t been roasted yet.   DJ is going to plant some at his house to see if they will grow.
We will have to come back when they flower.  Coffee flowers usually don’t last long but the flowering season is not to be missed since it promises clusters of pure white jasmine-like flowers!  
Greg cut us down some coconuts for refreshment with the guaili’.  He got pretty good at dislodging avocados and then catching them himself.  After this picture was taken, we had a pretty good downpour that lasted for most of our hiking adventure.  We got soaked!     
I was only able to get a few shots with my camera phone due to the deluge.  We probably got to pick 10-15 pieces of avocados each which are now all eaten.  We will have to schedule another visit to the jungle grove soon!  Maybe get some taro for soup?  Or some bananas will be ready?  Let's go!

Ti napu.
The Beachcomber

Tuesday, June 19, 2012

More Saipan Nudibranchs

Nudibranchs are related to marine snails.  Although they are related, they do not have shells as thy shed them before they become adults.  They are amazingly varied and colorful, and people around the world "collect" them in pictures.  The name "nudibranch" means naked branch because of their exposed gills.  People more commonly call them "sea slugs" which is not a very flattering name.  Interestingly, the Japanese call them umi ushi meaning "sea cow" because they have head tentacles that look like horns.  These are sensory organs called rhinopores.

You can find a few nudis in the shallow waters of Saipan's beaches.  You just have to look carefully since they are very small, and although quite colorful, they are camouflaged well in the marine environment.  This is the Elysia ornata I found a few weeks ago in Obyan Beach.   
I found a few more this weekend that I would like to share.  I do not have an underwater camera and couldn't get a picture of the Thuridilla gracilis that I saw in Obyan last week.  I did manage to find another one at Coral Ocean Point.
She was strikingly beautiful and only about 15 millimeters long. 
Can you tell how tiny she is from the size of the sand grains in the picture?  Tiny!
Another really common nudi is Plakobranchus ocellatus that has purple and lavender spots.  I guess that is why they named it after an ocelot.  I only had a camera phone with me, so sorry if the pictures aren't that great.
They are a lot bigger than the T. gracilis, at about 30mm long and 10mm wide.  I found a few of them in the shallow reef flat of Wing Beach.


I think they must be pretty common here since I always happen upon them at several shallow beaches.  You can check out more nudibranch information and look at beautiful pictures in Nudipixel where a few of my friends have contributed their finds from Guam and Saipan. 

I think these maybe are the more common shallow water nudibranchs around here but I will keep an eye out for others.  Thanks for talking stories again.

Ti napu.
The Beachcomber